Have you ever wanted to switch to another phone, to atleast give it a shot but are afraid to lose your Unlimited Data plan on your iPhone? Well, you can do that technically anyway if you are sure to switch back within 30 days, however if you plan on keeping your device you are required to “Switch” your data plan. Instead, we are going to show you how to get around this “Data Plan Change”.
If you have let’s say for example a HTC One X, and would like to change out the micro-SIM card from your iPhone 4/4s and put it into the HTC One X to keep your plan going just as it is, and do not want to deal with customer service then this is what you need to do.
First, Remove the SIM card from your iPhone 4/4s using the SIM removal tool, or a standard size paperclip. ( If you have the HTC One X, it also Includes a SIM removal tool that would work just fine for this purpose. Then, once you’ve removed it install it into the similar SIM tray of your HTC One X ( or any android device, though this specific guide is demonstrated using Ice Cream Sandwhich ) . Once you’ve done that, boot it up but don’t run for the coffee machine thinking you will be able to make a cup before boot-up.
The next thing you are going to need to do is, navigate to the settings screen. You can do this by navigating the APPS on the device and there will be a Settings APP, or you can use the “Pull Down” quick settings dashboard, and from there you will see the “Settings” gear button as shown below in.
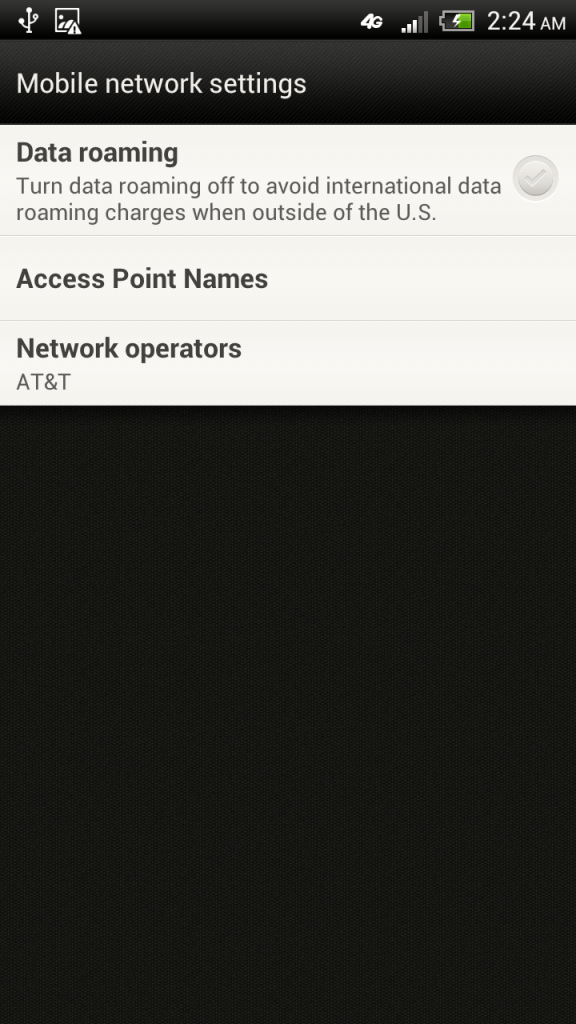
Next, tap on the “MOBILE NETWORK” option, but do not touch the “On/Off” button, unless it’s off as it will need to be “On”.
Next you will tap “Access Point Names”.
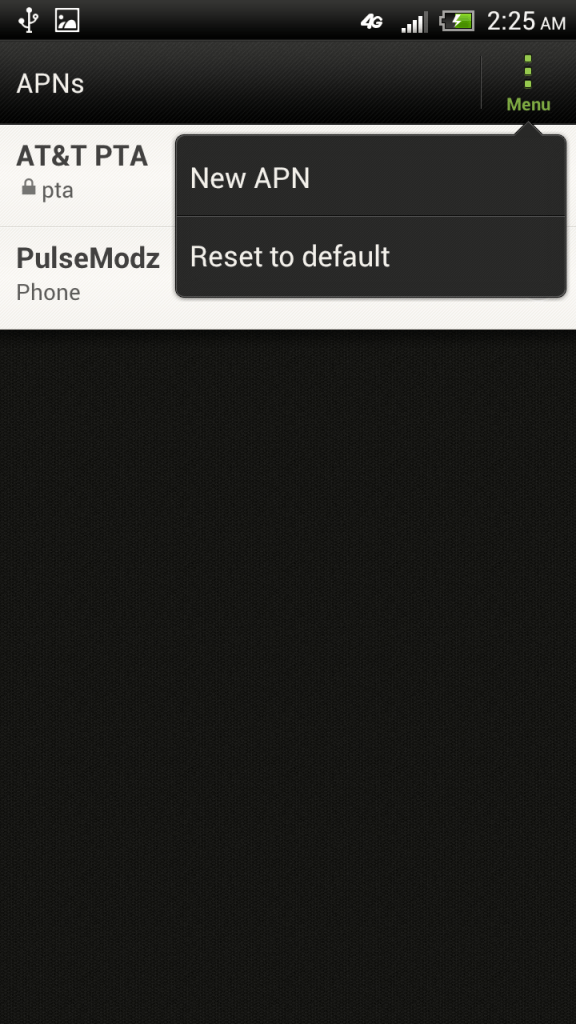
From there you will tap the “Menu” button and then choose “New APN” .
To sum up the first instructions in location of the APN Settings here is a clarification: Settings -> Mobile Network -> Access Point Names -> New APN.
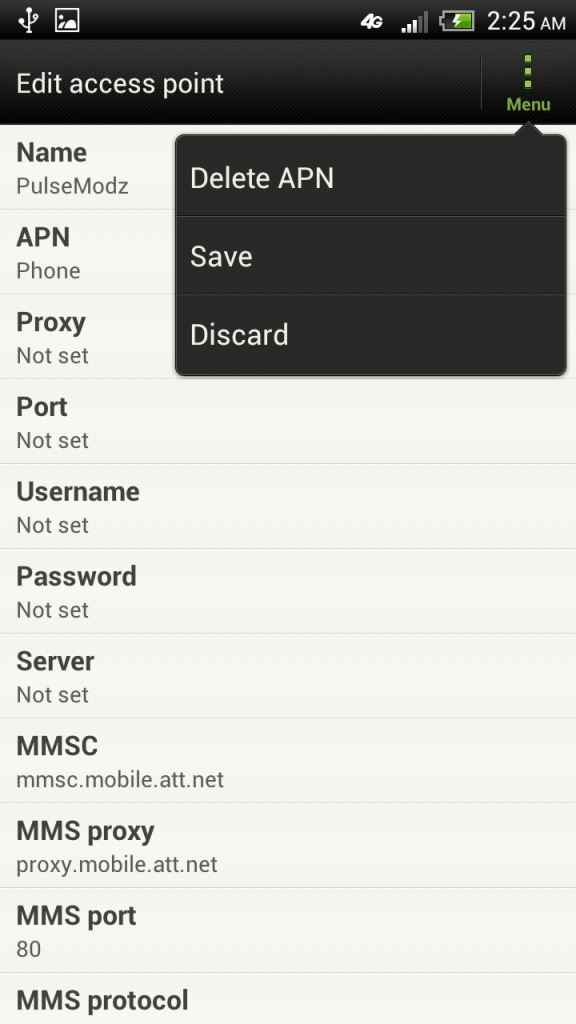
Once you’ve made it this far, your next step is to match all of the fields in the next two screens shot, with your newly created APN. You can “Name” your APN whatever you would like, but feel free to set it up as “TechieIO” if you heart desires.
Be careful, to match everything exactly you see here. If anything is different, then please re-check otherwise you may not be able to activate your APN. You will then need to tap “Menu” again, and hit “Save”.
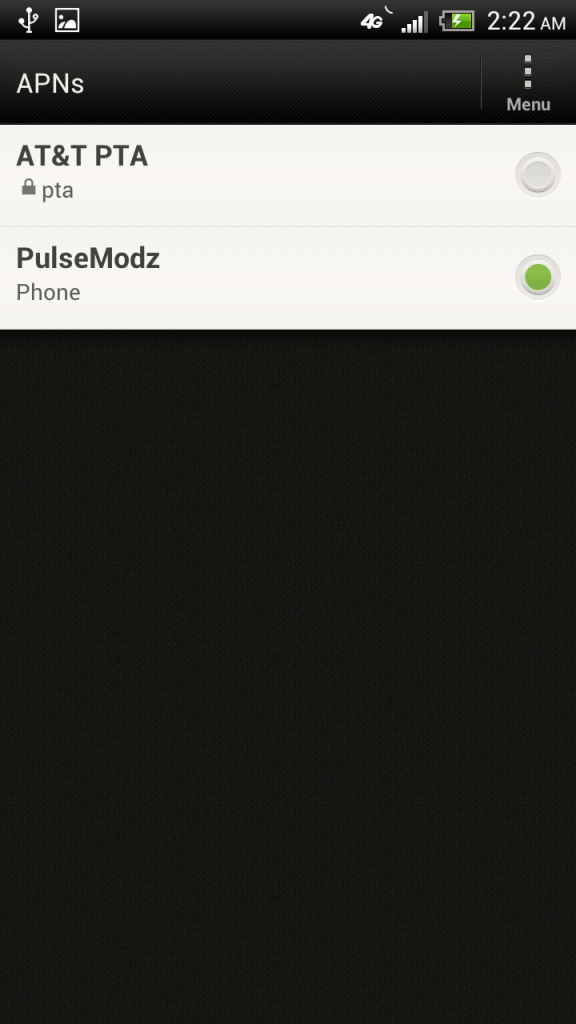
Your next screen, will bring up the existing APN as it’s activated by defeault. To finish off your settings you will want to activate the “New” APN you created. In this case it is “TechieIO”.
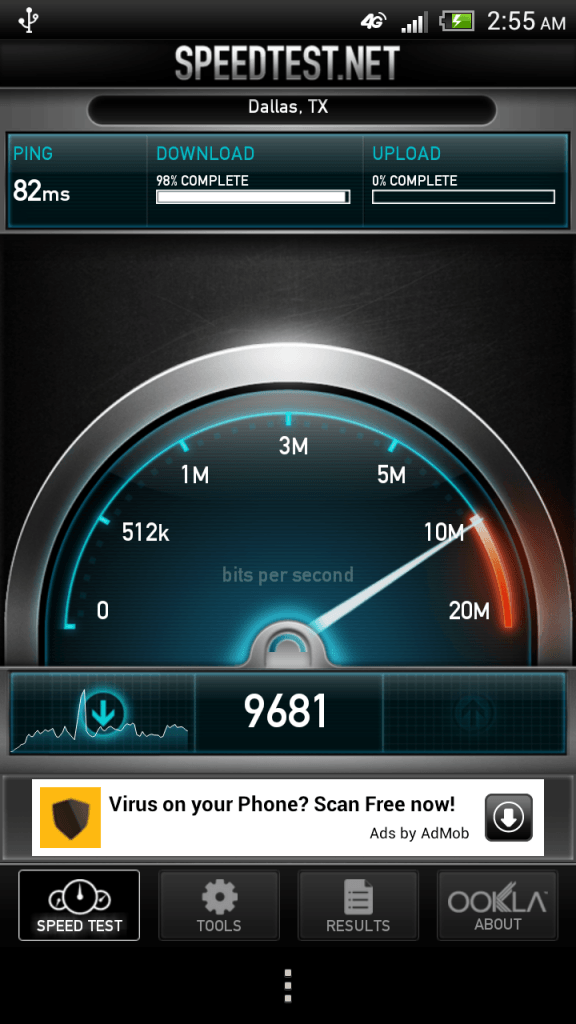
These settings have been tested with 4G LTE, SMS and MMS services and are verified to be working. See the below screen shot Speed Test.


